Charging a Non-Rechargeable Vape
1/30/2024, 9:43:54 AM 5266
1、Understand the risks involved.
A non-rechargeable vape is not meant to be recharged. Attempting to recharge the battery may result in electric shock, overheating, and burning. The battery could also explode. It is also possible that you may permanently damage the vape when you take it apart. Continue at your own risk.

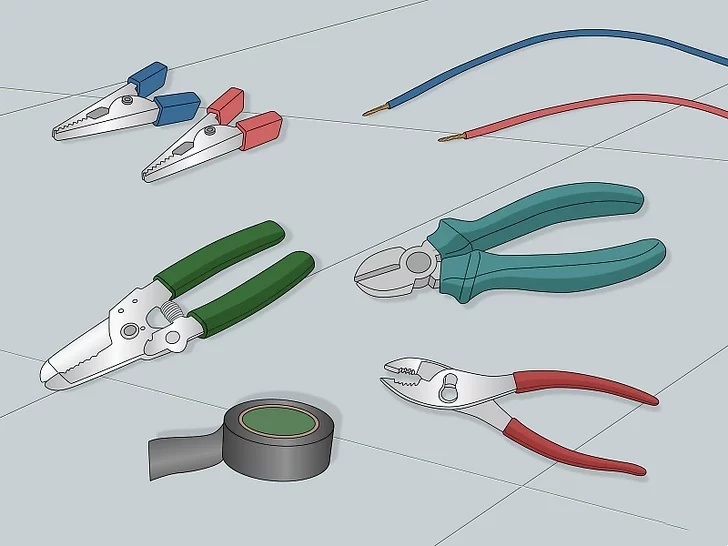
2、Get the tools you need.
There are a couple of tools you will need in order to try to recharge the battery. They are as follows:
- Pliers.
- Red and black wires, or a USB cable (to be destroyed).
- A USB wall charger or a lithium-ion battery charger.
- Wire cutters.
- Wire strippers
- Electrical tape.
- Alligator clips (optional, but recommended).
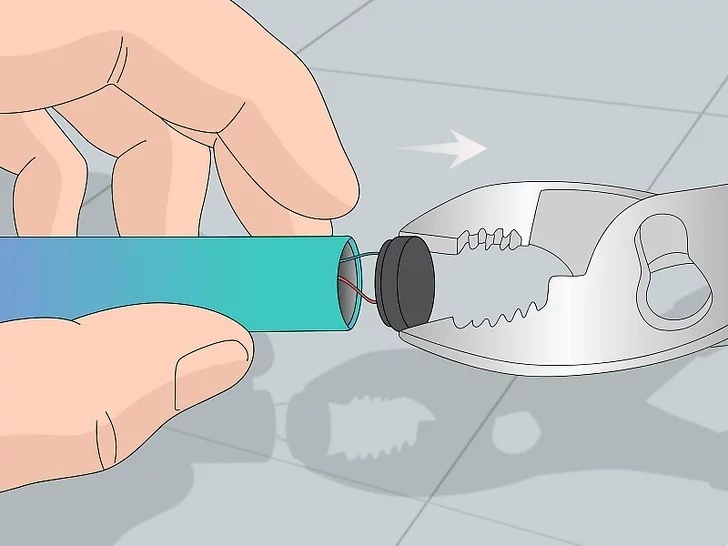
3、Remove the bottom of the vape.
To do so, use a pair of pliers to grab the bottom cap of the vape. Gently twist until the bottom cap comes off. The contents of the vape should slide out.
- If the contents of the vape don't slide out, you may need to remove the mouthpiece on the top of the vape too. You can use your pliers to remove the mouthpiece as well.
- Be careful removing the insides of the vape. Wires and pieces may easily break.
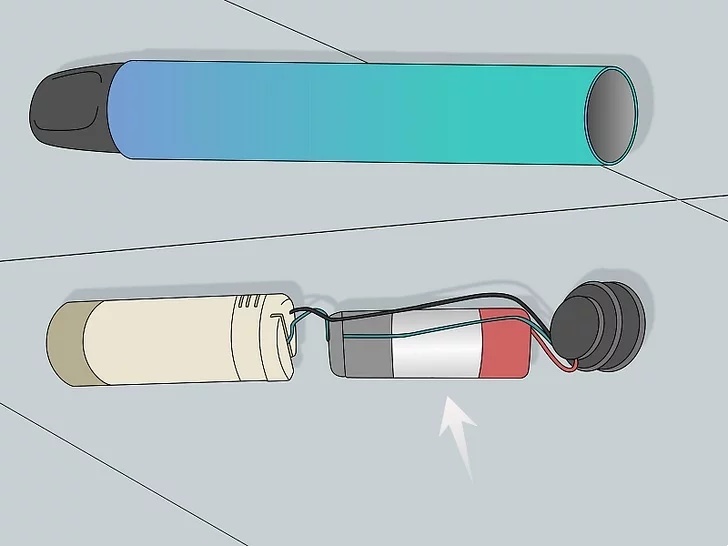
4、Locate the battery.
The battery will be cylinder-shaped. It will most likely have red and black wires attached to it.
- You may also want to check how much e-liquid is left in the tank. If there isn't any liquid left in the tank, you may be able to refill it. If not, it may not be worth it to try to recharge the battery.
5、Prepare your wires.
If are using a USB charging cable, you will need to cut the USB plug off the end of the charging cable. Then look for a red and a black wire inside the cable. Strip the black and red wires so that an inch or so of bare wire is exposed.
- If you are using regular black and red wires, just make sure they are stripped on both ends so that an inch or so of bare wire is exposed.
- It is recommended you use a lithium-ion charger and wires instead of a USB charger since it is specifically designed to charge lithium-ion batteries. You also won't need to ruin a USB charging cable.
6、Identify the positive and negative terminals on the battery.
The battery may have a plus (+) and negative (-) sign identifying the positive and negative terminal.
- Usually, the negative terminal is connected to the LED, and the positive terminal is connected to the tank.
- If it has red and black wires attached, the black wire is attached to the negative terminal, and the red wire is attached to the positive terminal.
7、Connect the wires to the charger.
- If you are using a USB cable, just plug it into a standard USB wall charger or charging block.
- If you are using red and black wires, you will need to use a lithium-ion battery charger. Connect the black wire to the negative terminal on the charger (it usually has a spring or coil). Then connect the red wire to the positive terminal of the charger.
- You may want to use alligator clips to connect the wires. Though you may need to use a separate clip or electrical tape to hold the red (positive wire) in place.
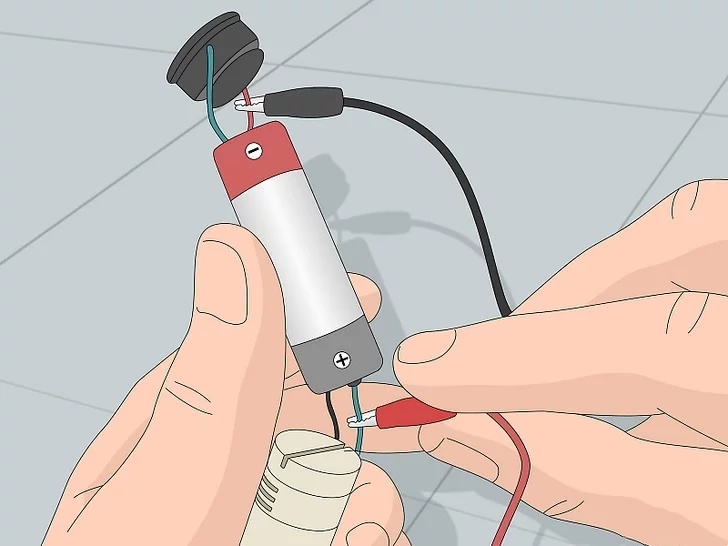
8、Connect the wires to the battery.
You can use an alligator clip or electrical tape to connect the red wire to the positive terminal of the battery. Then connect the black wire to the negative terminal of the battery.
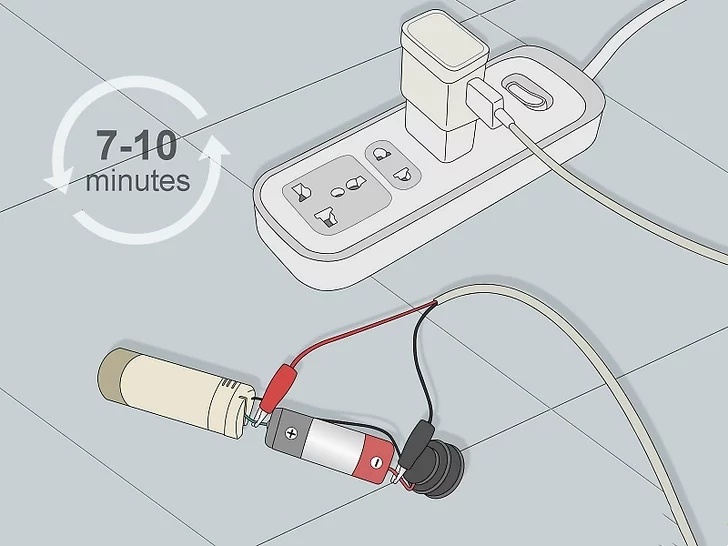
9、Plug the charger in.
Allow it to sit for a few minutes while the battery charges. It's recommended you let it sit and charge in 7 - 10 minute intervals.
- Do not leave the battery unattended while it is charging. If you see smoke or the battery or wires start getting too hot, unplug the charger immediately.
10、Reassemble the vape.
Make sure to put everything back together exactly like it was when you took it apart. After letting it charge for 10 minutes, try to put the vape back together to see if it works. If it doesn't, try to let it charge for another 10 minutes. If it still isn't working, you won't be able to charge the battery.
SHARE


TABLE OF CONTENTS
RECENT NEWS

MEMERS Vape Launches the V40000, World's First Curved 3D Dynamic Graphic Screen Disposable Vape, Keeps Driving Innovation in the U.S. Market

MEMERS Vape’s Ambition, the World’s First AI Vape Company

Shenzhen SKE Technology Launches MEMERS VAPE: A New Chapter in Vaping Innovation
Do Vapes Expire?

How to Make Vape Juice?